Archive Page 3

confidence boost

Well, here we are a solid week into Spring. And while I wouldn’t exactly say that the melt is on, we have at least had a handful of days above freezing. Which has given me a chance to sneak out to my bees for the first check of the year. I haven’t lifted their covers off since October – five long months ago. And unlike most winters, I’ve barely even been out to put my ear against the hives for a telltale, hopeful listen.

winter-bees

Which means that I was especially wound up on my drive over to the bee yard. I was fairly confident that I left both hives with enough of honey for their winter food supply. But I’m also painfully aware at what a remarkably harsh winter its been. Even if a hive has enough honey, if it is too cold for too long, individual bees won’t be able to break away from their big cluster to access it.

I also knew that one of the hives – the reinging Queen Ella-Bella – went into the winter with a slightly smaller population than is ideal. True, fewer bees means less mouths to feed, but the hive also needs critical mass to maintain a cozy interior hive temperature of roughly 80º F. The bees achieve this by banding together in a big clump and literally shivering their flight muscles all winter long. No rest for the weary, I tell you.

fall-cluster

Since it was my first formal visit to the hives, I decided I had better bring gifts. I’d been away five months after all – it just didn’t seem right to show up empty handed. I didn’t know if the hives had survived or not, but I wasn’t in the mood to take chances. I reasoned that if they were still living, they are most likely starting to run low on honey. So I mixed up a fondant like ”candy board” for each hive. Which is basically a cooked sticky mixture of sugar, water, and vinegar.

I also mashed together a pollen substitute. If things were going according to plan in the hives, the queens started laying new eggs back in February. But developing larvae need pollen in their diet. And if my phenology records are to be trusted, it will be mid to late April before the maple trees are budding and even longer until the dandelions are blooming. And this particular “Spring” doesn’t seem to want to play along. Things could get ugly.

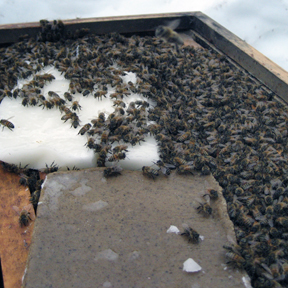
I got to the bee yard and awkwardly hobbled over snow drifts, clutching my my sugar cakes and pollen patties for fear they fall and disappear into the abyss. Ordinarily I start my hive check with the most easterly hive, but since I was nervous and wanted a confidence boost, I decided to look in on the stronger of the two hives first. I pried the lid off Hallie Frances’s hive and to my sheer delight, a handful of bee friends – albeit slightly stunned – buzzed up to greet me. My heart literally leapt. I resisted the urge to pull out an entire frame for a better look. Because even though it was technically above freezing, it was also snowing. I plunked down their sugar and pollen treats, ushered a few strays back into the hive, and sealed them back up.

winter-cluster

I sank deep down into a snow bank and sighed with relief. Hallie’s hive looked amazing. Her large population of bees will almost certainly need to be split into another hive later this spring. That’s the best any beekeeper can hope for. Even if EB’s hive hadn’t made it, I knew I would still have two hives of bees to keep company with this summer. I wrestled myself free and held my breath as I proceeded on to the second hive. I popped the lid and found another bunch of buzzing bees. The clump was much smaller, but Ella’s girls were hanging on!

I drove home with a grin on my face, bursting to share my good news with someone. I e-mailed my beekeeping friend (and source of both of these hives) Kris with the late winter bee report. I knew she’d understand. And she did. She replied back saying that my news was like getting an overseas letter from someone dear and feeling so relieved that everyone is still okay. Which really struck me. Because in this day and age, waiting for an overseas letter doesn’t really happen anymore, does it?

Kris’s comment reminded me that we live in a society that is increasing losing its ability to wait, its capacity to simply not know. And for the umpteenth time since I started keeping bees, I understood that the bees were teaching me something I should pay attention to. They were showing me of the value of uncertainty. That not only is it okay to wait and wonder, it’s often immensely more rewarding to do so. Of course, it can also be more heart wrenching, but either way, I’d argue the waiting – if we let it – takes us to a deeper, more meaningful place within ourselves. The practice of not knowing keeps us hopeful and raw and real.

And you know what else? I’m learning that it’s okay to live with  a little anxiety. Healthy even. Every bit of the the type A-ness in me wants to squelch it out, but my itty-bitty bee brain tells me to let it rest. To hover around it, invite it in, and let it breathe a bit. Because sometimes, living with a little unease is the best way to learn about who we are and why. And the more we understand and respect that, the better we can be for one another.

spring-nuc-cluster

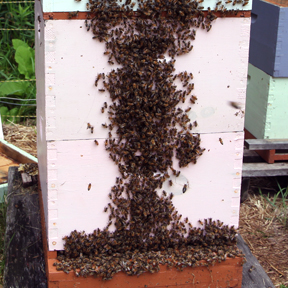
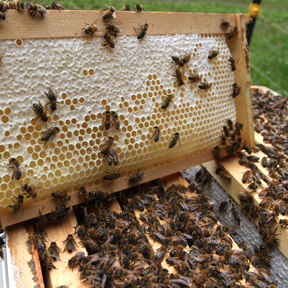
(The photos in this post show Hallie Frances’s hive just starting out in May 2013 (bottom), in October 2013 after a summer’s worth of work (top), and March 2014 on the tail end of  a long, cold winter.)

sprout junkie

Last winter, in the middle of March, my friend Kris came to dinner. I remember this, because the hostess gift she brought changed my life. After everyone made it in the door and the rigamarole of coats, boots, and cold hugs had subsided, Kris came into the kitchen and set down a plate. I pulled back the covering and was greeted with several perky shades of green. GREEN. IN MARCH. Kris had brought me, of all things, a plate of sprouts.

As an (almost) lifelong vegetarian, I’ve always thought I should be more of a sprout fanatic. I mean they are quintessential vegetarian food, right? Maybe. But in all honesty, a plastic carton of alfalfa sprouts does absolutely nothing for me. Nor a bag of yellowing mung bean sprouts. Too often their mineral taste and chalky texture overpowers everything else, leaving a disparaging taste in my mouth.

soaking

But right away I could tell there was something different about Kris’s sprouts. For starters, they were so GREEN. And so FRESH. Kris gave me a quick run down. There were pea shoots, mung beans like I’d never seen, a spring mix with broccoli and spicy radish, crunchy lentils, and glorious pile of sunflower sprouts. I sampled a pinch of each and knew right then and there that my winter kitchen was going to be a different place.

I do my best to eat with the seasons, which means there are several months (too many really) where succulent leafy greens are more or less absent from the scene. Sometimes out of desperation I’ll let loose and bring home a bag of arugula or spinach, but besides that, cabbage is my leafy green stand in. So to know that I could replicate these flavor packed, crunchy green sprouts all winter long was almost more than I could handle.

I ruthlessly started quizzing Kris. Where does she get her seeds? (a Canadian company called Mumm’s) Do I need any special equipment? (canning jars, a few pieces of fine screen mesh, and maybe a aluminum pie tin) How long does it take? (2-7 days depending on the seeds and your preferences) How much maintenance is involved? (after an initial 4 hour soak, a good rinse twice a day). How long do they keep? (a week or so in the fridge). I could do this, I thought. And I did.

Confident that this was a kitchen habit that would stick, I placed a sizable order (with so many choices, it was hard to resist). I store a small jar of each variety  in the pantry and restock from the freezer – where the seeds stay vaible for a good long time. I’ll put my sprouting supplies away for the summer months, but from November through June, look out. My kitchen counter comes to life!

spouted!

I have become a full on sprout junkie. I enjoy them all, but two that always make the rotation are sunflower spouts (which I have a tendency to gulp down by the handful,  often eating the entire tray before it even makes it into the fridge for storage) and mung beans. But unlike the long, slightly yellow, slightly slimy mung shoots I find at the grocery store, I now enjoy what seems like a completely different food – crunchy, petite, fresh, protein laden nuggets. The key with mung beans, I have learned, is to only sprout them for a few days, until just the start of a shoot appears. Lightly steaming at this stage unlocks a world of flavor and texture.

I eat sprouts plain with a pinch of crunchy salt whenever I’m in the mood for something raw and green. All winter long I deploy them as edible garnish on just about anything. I cook with them too – adding the larger beans to soups and pastas and reserving smaller leafier sprouts for sandwiches and omelets. And for a night of ultimate wintertime culinary fun, I toss as many varieties of sprouts as I can together for a crazy, crunchy, flavor-packed salad. Whoowhee!

But in keeping with my quiet Scandinavian stoic roots, I often take it down a notch and opt for a more subtle, steamed mung bean salad. The toppings vary, but the result is perfectly satiating. It is, hands down, one of my favorite winter salads.

stoic-steamed-salad

Mung Bean Salad for 2 (or 1 if it’s the dead of winter)

2 large handfuls of fresh mung bean sprouts, steamed in a small amount of water for just under a minute. They should be green and toothsome.

Drain and divide among 2 small plates.

Top with any or all of the following:
a dash of oil (olive and/or toasted sesame oil)
a dash of rice vinegar
a dash of soy sauce
(or mix all of the above together with some fresh garlic and ginger for a simple Asian inspired dressing)
fresh scallion
dried shallot
preserved lemon
toasted sesame seeds
crunchy, coarse salt

* A note on sunflower seed spouts – you can sprout them in a jar like all other seeds, but Kris turned me on to using a disposable pie tin with small holes poked throughout the bottom. The seed hulls fall away to the bottom of the tin and the sprouts grow more upright, making them easier to harvest.

cabbage dialogue

I’ve got a wireless weather station on my wall that gives me all sorts of stats. Humidity, sunrise, sunset, moon phase, and naturally, temperature – indoor and out, high and low. But really I get all the information I need from the little fellow in the middle of the LCD display. Weather Boy. He sports a range of weather dependent wardrobe options, from swim trunks to full winter regalia complete with scarf and hat. Anything below freezing and a snowman appears by his side. And that’s all I need to know. I probably don’t need to tell you that Weather Boy has been in the company of his snowman ALL winter.

weather boy

Polar vortexes, arctic blasts, record setting wind chills – it’s been one wicked winter. Last time I checked, Lake Superior is 93% frozen and is on track for a complete freeze over. This hasn’t happened for 18 years. And it’s been 20 since we’ve had a January as cold as this one was. Earl has set a new personal best for taking care of his daily business. I haven’t ventured out to check on my sweet little bees since December – partially because of temperature and partially as an exercise in letting go. One of our backyard treasures – the Apostle Islands Ice Caves – has gone viral, generating throngs of people that (for me at least) dilute the magic of it all. The woodshed is frighteningly low. Propane is hovering at $5 per gallon.

Despite all this, there is one thing that delivers solace. Cabbage. I am rich in cabbage. No matter how bad it gets, there will be cabbage.

Apostle Islands Ice Caves

Is it worrisome that I’ve been channeling the pioneers and early settlers? They survived much worse – quite possibly without cabbage. So I consider myself lucky. It’s difficult, in all this snow and cold, to accurately recall the garden, but my cabbages help remind me. Last summer boasted perfect conditions for late season greens. I loaded up our make shift root cellar this fall and have continued adding to it with cabbages from our Hermit Creek Farm winter CSA share. I pull one out about once a week. That’s the beauty of cabbage, it’s durable. Even a tired, slightly slimy cabbage can be revived by peeling away a few outer leaves.

I must not be the only one with a cabbage surplus. I’ve overheard an unusual amount of cabbage dialog this winter. My aunt Lynn turned me onto a bright tangy slaw from the original New York Times Cookbook with caraway, onion, mayo, and plenty of lemon juice. When my friend Ann saw Mollie Katzen’s latest Heart of the Plate, on my shelf, she raved about the peanut coleslaw – tenderized cabbage with a savory peanut sauce. And the always inspiring Mary over at the Cookery Maven motivated me to make my first ever hot and sour soup – cabbage based, of course.

cabbage-wedge

But it’s awfully hard to beat plain old chopped cabbage sautéd in a little butter with onion, salt and garlic. Add a thinly sliced potato for bulk, a pinch of caraway, maybe a fried egg over the top and you’ve got a stick-to-your-ribs winter meal any homesteader would be proud of. And I’d argue it’s nearly impossible to top roasted cabbage. Far too late in life I discovered the glorious things that happen to cabbage when it meets a hot oven. It turns melt in your mouth soft and takes on a rich, caramelized sweetness. Even non-cabbage people tend to like it – trust me on this, you non-cabbage people.

Roast cabbage can be served in any number of ways, but my favorite – like most things – is to keep it simple. I love a big spoonful slopped alongside of a bowl of warm beans. Good Mother Stallards are my choice, but any dense meaty bean works. Sprinkle a little shaved Parmesan over the top, pour a glass of wine, and cozy up to the fire. Winter never looked so good, despite what Weather Boy has to say.

winter antitodte

Oven Roasted Cabbage

Peel away any tired outer leaves from the cabbage and remove the core. Cut into even slices, about 3/4-inch thick. Lay slices on a baking sheet and rub with olive oil, salt and pepper. Roast in a 400º F oven for about 30 minutes, turning one half way through. Try and keep the slices intact when you flip them. Remove form oven when cabbage is slightly browned and has a few toasted edges.

root redemption

Well, it’s happened. I’ve reached the stage in winter where I simply can not bear all the layers I put on to keep warm throughout the day. This longing to shed my wool tights and polypro zip-ups for loose, flouncy clothing crops up every year. But this year’s feeling of bulky, confinement has arrived substantially earlier than usual, which is troublesome. There’s a lot of winter left up here in Northern Wisconsin. This past week has left me desperately rooting through my wardrobe for signs of hope. My kingdom for something gauzy and peach.

rooty

On Saturday I took my gloom into the kitchen and decided to rummage through the crisper drawer instead. I was reminded that it can get pretty bleak in there this time of year too. My hands had landed on a couple of castoffs. Two large, lumpy softball size rounds of celery root. They’ve been loitering in there far too long. One arrived in December and the other made it’s way into the drawer in early January. Both came as part of our monthly winter CSA share from Hermit Creek Farm. I keep meaning to shred them up for the crown jewel of a wintery salad, but somehow they’ve eluded me. I displayed them on the counter for inspiration. That’s when it hit me. All these confining layers and lack of sunlight. I feel just like a piece of celeriac. Bulky, pale, gnarled, and in the case of these two particular roots – dejected.

I could overcome this, I thought. It was -12ºF after all. What else did I have going on? I turned to scan my cookbook shelf. I pulled out a few dead ends before my eyes landed on Vedge – a relatively new book in my collection given to me by my friend Julie. An exciting and appropriate addition to my shelf as I reembark on vegetarianism. Written by the owners of the of the Philadelphia based restaurant of the same name, the book is filled with  wildly stunning combinations. There is no doubt that Rich Landau and Kate Jacoby are passionate about their vegetable. Vedge offers up no less than four celery root recipes.

celery root

I decided on Celery Root Fritters and Rémoulade – two vastly different preparations of the same vegetable. I was intrigued. It sounds fancy, and it even looks fancy, but it was a cinch to prepare. The recipe makes an insane amount of rémoulade (a classic French mayonnaise based sauce) but I was okay with this. I put it on everything for the next three days – toast, mashed potatoes, giant white beans, I even crowned a wintery salad with it. The rémoulade was such a bright addition to my winter staples. I’d make this recipe again in a heartbeat (more celeriac please, Hermit Creek Farm!) and I wouldn’t adjust the quantities one bit.

Be warned however, that even after you free the celeriac of its knobbly exterior, you’re still left with a pretty sad looking vegetable. I was feeling dubious at best. But I forged on, encouraged by the gorgeous photos in the book.  I served our fritters over a bed of wild rice (also courtesy of our Hermit Creek Farm winter share – have I mentioned how much I love my farmers?) with some simple greens. I sat down and lit the substantial pillar candle that graces our winter table for months on end. And I felt redemption. If a lumpy, dull celery root can undergo such a worthy transformation, isn’t there hope for all of us? Perhaps there’s more significance to the need for endless layers than meets the eye. Let’s hope.

friiters!

Celery Root Fritters and Rémoulade
(From Landau and Jacoby’s Vedge)

Rémoulade:
2 cups peeled, grated celery root (1 pound)
(a shredder attachment on a food processor works great for this)
1/2 cup mayonnaise (vegan or regular)
4 cornichons
2 tablespoons capers (salt brined if possible)
1 tablespoon dried dill (or 2 tablespoons fresh)
2 tablespoons Dijon mustard
2 tablespoons shallots, chopped

Blanch the grated celery root in a pot of salted, boiling water for about 5 minutes. Drain well, squeezing out any excess moisture as it cools. Meanwhile, combine the remaining rémoulade ingredients in a food processor and pulse to combine into a chunky, but creamy mixture. Transfer to a bowl and stir in the cooled celery root.

Fritters:
2 cups celery root, peeled and diced (1 pound)
1/2 cup onion, chopped
2 tablespoons olive oil
2 teaspoons salt
2 teaspoons black pepper

Combine and roast on a sheet pan in a 300ºF oven for about 20 minutes until tender. Remove and let cool slightly. transfer mixture to a food processor and blend until it forms a chunky paste. Form into 4 or 5 balls and flatten into discs about 1 1/2 inches thick. Set the fritters onto a piece of parchment as you go.

Coating:
Mix 1/4 cup chickpea flour (or substitute any other type of flour, but the chickpea adds great flavor) and 1 teaspoon Old Bay Seasoning (a favorite that I personally think no spice drawer should be without!) on a plate or shallow bowl. Dredge each fritter in the flour mixture and return to the parchment.

Heat 1/4 cup peanut or canola oil in a frying pan over high heat until the oil starts to ripple. Carefully place the fritters in the oil and brown each side for about 2 minutes. Once the fritters are golden brown, gently remove to a paper towel.

Serve immediately with a generous spoonful of rémoulade atop each fritter. Lovely over a bed of wild rice.

celeriac

toing and froing

Whooboy. I’m in transition. Really, I’d like to hope I’m on the backside of transition. November brought an opportunity to work on a more permanent basis with one of my long time design clients. So I’ve been busy juggling freelance work while also settling into a new life in the marketing department at Northland College. It’s great, I love it, change is inspiring. I’m just a lousy juggler.

juldough

I knew going in that this year’s holiday baking regimen might be compromised. Realizing I had a limited amount of time in the kitchen, I thought long and hard about what would fill my holiday tins. My week 52 toffee for sure – it was the first (and last) thing I made. Another no brainer was a few batches of the Smitten Kitchen’s spicy brittled peanuts. And I painstakingly narrowed it down to just one cookie recipe. Great Aunt Mable’s recipe was a top contender, but in the end, I settled on a simple Swedish rye cookie – another nod to Grandma Myrtle and my Scandinavian roots.

I’ve been fussing with a rye cookie recipe that came attached to a Julebock cookie cutter I bought years ago. The Julbock is the popular Scandinavian Christmas goat – you know the one – usually made of straw and tied up with a red ribbon. In the playful spirit of the goat, “julbocking” is a Scandinavian tradition that involves going from house to house to make mischief and merriment. I didn’t grow up julbocking, but I did grow up with a red wooden goat, handmade by Grandpa Orville. It was, and remains, my favorite Christmas decoration. As a kid I think I was drawn to the shiny red paint. But as an adult, I relish the symbolism of playfulness and joy. It’s too easy to lose that in all the hoo-ha.

julbock

Which is precisely why I decided to mix up a batch of jolly Julebock rye cookies. They would be the perfect antidote to this extra helping of chaos I’ve been indulging in lately. All month I moved my marked up recipe card around the kitchen as a prompt to fire up the mixer. From the counter, into a cookbook to mark a page, inside the mixing bowl itself, and back into another book. Herein lies the problem. In all my toing and froing, I lost the recipe. At least three times I spent what should have been precious baking time ransacking the kitchen for the recipe. Did I mention I’m a lousy juggler?

The recipe eventually unearthed itself, a few days after Christmas, from a pile of neglected paperwork in my office. Better late than never when joyfulness is on the line. I galloped straight into the kitchen, put on some Johnny Cash, and got out my rolling pin. I love this cookie. It’s complex, and not too sweet – which means it isn’t for everyone. But for me, it means not being able to keep my hand out of the tin. It’s also a perfect afternoon tea cookie. And, as with all cut-out cookies, don’t limit them to the Christmas season. Think valentine hearts, four leaf clovers, flying witches, and showy turkeys.

Swedish Rye Cookies

I’ve made this recipe a handful of times, altering here and there as I go, and I’m finally 100% satisfied. The biggest change I made is to swap in honey for white sugar. If you’d rather use sugar, omit the honey and use 1/2 cup sugar. The dough might seem a little sticky after chilling, but it is very forgiving. Just don’t be shy about rolling it out on a well floured surface. It makes all the difference. Feel free to play with spice combinations as well.

3/4 cup butter
1/3 cup honey
1 large egg
1 1/3 cups rye flour
2/3 cups white flour
1 teaspoon ginger powder
1/2 teaspoon ground cardamom
3/4 teaspoon kosher salt
2 teaspoons baking powder

Cream the butter and honey together. Add in egg and blend well. Mix together dry ingredients in a separate bowl and slowly add to the butter mixture. Mix thoroughly. Form the dough into two flat rounds and chill for at least an hour, or overnight. Roll out the dough rounds on a well floured surface to about 1/8 inch thick. Cut out cookies and transfer them to baking sheet with thin spatula (you can re-chill and re-roll the scraps once – more than that and they run the risk of getting too floury). Bake at 350º F, 5-6 minutes for smaller cookies, 8-10 minutes for larger shapes. Watch carefully – they brown quickly! (Makes about 6 dozen, smaller 2″ cookies)

joy

dabbler to devotee

I am not a morning person. My whole life I’ve wanted to be a morning person. It sounds so lovely to get up and greet the dawn with clarity and vigor. I’ve tried, believe me. But forty two years into it, I can say –  with certainty – that I am not a morning person. I’m not a cranky morning person, mind you. I’m just a tired morning person. There is no clarity and no vigor.

south-dakota-sunrise

Such as it is, I make it a point to turn in early for a good night’s sleep on Thursdays. Just so I can get up early enough every Friday to walk the dog, steep a cup of tea, find my yoga pants, and scramble out the door for an 8 am class at Humble Be. I know, I know – those of you who are lucky enough to be morning people are scoffing at this. It’s hardly the break of dawn. But those, like myself, whose witching hour starts at 9 pm, will understand. It goes against our nature. It’s hard.

Still, this Friday morning yoga class is the highlight of my week. The experience is so completely nourishing that by the end of class, I’ve nearly forgotten I’m not a morning person. Really I get this same groovy vibe with all  of the classes I take at Humble Be, it’s just the Friday morning class stands out. Because it’s really something to walk out the studio’s big wooden door after class and greet the rest of Friday with clarity and vigor. This is as close as I will come to achieving morning person status.

Until relatively recently, I considered myself a yoga dabbler. I’ve tried a variety of classes in a variety of places and have even cobbled together and on-and-off-again home practice. I essentially started doing yoga as a way to move my body and stay flexible. But my Humble Be experience has turned my yoga world upside down. I’ve gone from dabbler to devotee. I’m not just practicing yoga to move my body anymore. I’m doing it to move my mind and my breath too.

I’m a regular at several Humble Be yoga classes and I’ve come to truly appreciate how seamless and well thought out their classes are. Humble Be instructors consistently offer me a richness that my home practice lacks. A windy afternoon, for example, might inspire Kellie to talk about the push and the pull of daily life and the importance of being able to draw it all in. She’ll then devote the next 75 minutes to poses that focus on using the body’s core to help balance opposing forces that work against the body. It seems so subtle at the time, but two weeks later when I’m being yanked all willy-nilly in ten different directions, I’ll gratefully recall how I can use my body and mind to reign it all in.

stromy-weather

Likewise, I’m constantly reminded in classes how I can use my breath to calm myself down when I’m worked up, anxious, or frustrated. Just a few weeks ago, on my first bad weather drive of the season, I had four hours to play with a breathing technique I learned from Scott. And it worked! The deliberate pause at the top and bottom of each breath got me home. Humble Be classes encourage me to slow down and cultivate mindfulness. And it goes without saying that a regular practice has left me stronger, more flexible, and better balanced. Talk about a package deal.

Yoga can mean a lot of different things to people, but for me, Humble Be yoga helps define how I travel through each day. I may think I’m just popping into the studio for a quick class to stretch out, but inevitably, some little bit of teaching sticks with me well after my mat is rolled up. And my life is all the richer for it. Blessed be Humble Be.

bee bundle

I’ll be the first to admit that I have a recipe problem. I love recipes. I can read a cookbook like a novel. I’m not capable of paging through a cooking magazine without tearing out at least a handful of pages. And frequently when I’m asked to dinner, I’ll inevitably wind up in the host’s kitchen, asking for a pen to copy down some recipe I’ve discovered in their cookbook collection. There are worse addictions, I tell myself.

Needless to say, I have no shortage of recipes. It’ll be a miracle if I ever manage to cook my way through my stash. Of course that would require that I stop adding to it. Which isn’t likely. It’s such a thrill to stumble on combination of flavors I hadn’t thought of, or to find some fun magazine spread that instantly makes me want to throw a dinner party. But nothing compares to getting a recipe in the mail. Because it means that someone thought a particular recipe might resonate with me and come to life in my kitchen. I love that.

kitchen clips

I have a bulging folder of recipes to try – all waiting to see if they’ll make the cut and be taped into my permanent collection. But I keep a separate, slimmer file, of recipes that people have sent me. This is my favorite file to delve into. I tend to wait for more special occasions to try these recipes.

Which is what happened this weekend with a recipe that someone (thank you Pernille!) sent me months ago. I’ve been thinking of this treat, off and on, waiting for just the right time to try it. The recipe is for a simple, honey-based Italian budino (pudding). And right away, a sentence in the description caught my attention: “This is a sweet to enjoy straight, unembellished, the way you might a complex single-malt Scotch.” The idea being that flavor of the honey, be it a mild clover or an earthy buckwheat, will really shine through. That’s my kind of dessert.

bee-box

For me, late fall is the most melancholic time as a beekeeper. Its the time of year when I tuck in my hives, batten down the hatches, and wrap them up in black insulation – hopefully creating a bee bundle that will survive the long winter. I peek under each hive’s inner cover one last time, knowing we won’t see each other for almost 5 months. I’ll check in on them during the winter, but I won’t open up the hives again until the first March thaw. So my final trip to the fall bee yard is always a quiet one.

But this year, I knew just the thing to lift my spirits. Honey Budino. My friend Julie was hosting a dinner and I offered to bring dessert. It was the perfect ending to a lovely fall meal. Making  this luscious honey pudding was also a nod of gratitude to my bees. Something to make our parting a little sweeter.

Like most puddings, this one is not without its fair share of cream and eggs. I take comfort knowing it is spread over 8 servings. And the indulgence is worth it. This one gets taped in the book. My budino took a little bit longer to set than the recipe suggests, but I thinks it’s because I also had a tray of pumpkin seed brittle in at the same time. It’s hard to beat autumn in the kitchen. Enjoy!

budino

Honey Budino
From The Wall Street Journal
Aleksandra Crapanzano / Karen DeMasco

1 cup honey
1 quart heavy cream
1 teaspoon vanilla extract
3/4 teaspoon kosher salt
1 large egg
7 large egg yolks
1/4 cup plus 2 tablespoons dark brown sugar

In a medium-size saucepan cook honey until it darkens and just begins to smoke. Remove pan from heat and slowly add cream, whisking continually. Set aside.

In a separate bowl, whisk together vanilla, salt, egg, yolks and dark brown sugar. Temper yolk mixture by whisking in about a cup of the hot cream and honey mixture. Scrape yolk mixture into cream mixture and whisk until well combined. Strain through a fine-mesh sieve.

Divide pudding among eight 6-ounce ramekins. Place filled ramekins in a deep baking dish or roasting pan, spaced evenly. Add enough hot water to pan to reach halfway up sides of ramekins. Cover pan with foil and place on center rack of a 275º oven. Bake 15 minutes, then rotate pan, lift foil to release steam and replace foil securely. Continue baking, rotating and releasing steam every 15 minutes, until budinos are completely set around edges and slightly loose in centers, about 45 minutes total.

Remove foil and set pan on a rack to cool. When budinos are cool, remove them from water and refrigerate, uncovered, until completely chilled. Budinos can be stored, loosely covered, in refrigerator up to 2 days. Serve as-is, unadorned to let the honey take center stage.

october potential

Ouch. Normally October and I are fast friends. But this particular October has been something to recon with. This October took me in, chewed me up, and recently spit me out into a deluge of grey snow flurries. I’ll spare you the details, but do you want to know just how cruel October has been? I haven’t even planted my garlic crop yet. Terrible, I know. But that’s the beauty of garlic. It’s very forgiving.

October was at least kind enough to afford me a teeny bit of time in the kitchen. And there were some memorable moments to be sure. We had a surplus of fresh pressed apple cider this year, so I liberally took 2 gallons and slowly simmered it down to make 4 half-pints of an amazing boiled cider. It sounds extravagant, I know, to turn 2 gallons into 4 cups, but the result is worth it. The cider cooks until it turns into a thick, sweet-tangy syrup – somewhere between the consistency of maple syrup and molasses. I can’t decide how to use it first – spooned onto a cheese plate, glazed over roasted carrots or squash, mixed into a vinaigrette, or simply drizzled over vanilla ice cream. I’ll keep you posted on that as the winter wears on.

cider flow

Making boiled cider is really as easy as putting fresh cider in a heavy stock pot, bringing it to a boil, and then reducing the heat so it can simmer 4 – 5 hours. You really only need to give it an occasional stir until about the last 30 minutes. When it starts to thicken up, you want to stir more often to keep it from scorching. Remove it from the heat when the syrup gets to a consistency you like. That’s it – boiled cider. I went a step further and filled sterile jars and gave them a 15 minute hot-water boiling bath. But, like most concentrated sugars, this will keep almost indefinitely in the fridge, even without canning.

Then there was the night Mark came home with his sweatshirt bundled up and overflowing with fresh purple plums. We sucked down plenty of them fresh, but the stragglers got turned into a simple butter cake. My favorite fall cake – equally as good with pears, plums, or apples. And equally good, if not better, with coffee the next morning. That’s my kind of cake.

plums-in-a-pan

The other great thing about this cake is how fast and easy it is. Grease an 8×8 pan with butter and fill the bottom with fresh cut fruit. Melt 9 tablespoons of butter (it is a butter cake after all) and set aside. Mix 5 1/4 ounce (3/4 cup) sugar with 2 eggs. Add in 2 1/2 ounces flour (scant 1/2 cup) and 1 1/2 teaspoon baking powder. Stir in the melted butter and pour batter over fruit. Dust with a bit of nutmeg, cinnamon, or ginger if desired. Bake at 350º F for 40-50 minutes until cake is golden and crackly. See how much potential October has?

But I think the standout for the month was a garlic soup from Yotam Ottolenghi’s Plenty. The soup itself was simple, yet deceivingly rich and packed with deep flavor. But what really knocked it out of the park was the harissa garnish. It gives the soup just the right punch. For an even quicker meal you could sub in store bought harissa, but I wouldn’t recommend it. Yottam’s version is in the running for the finest harissa I have tasted. It’s well worth the extra 15-20 minutes of effort to mix it up fresh. It didn’t take me long to use up the leftovers – spooning it onto eggs, avocado toasts, and even a green arugula based pizza.

We had the soup as a meal with a big fall salad and sourdough for dunking, but I think it would make a particularly lovely first course for a dinner party. Twenty-five cloves of garlic may seem like a lot of work, but it’s really not too bad, especially if you don’t go and use teeny tiny cloves like I did and subsequently have to double the amount to 50. Careful use of a mandolin can make fast work of slicing perfectly thin garlic. As far as the stock and wine go, don’t skimp on quality – they really make up the flavor base of the soup. And the harissa! The harissa will become a kitchen staple for me, soup or no soup. It’s a tad on the salty side – which is one of the reasons why I fell in love with it, but if you’re leery of salt, start small and taste as you go.

toasty

Well there. I feel better for having gotten October off my chest. Hopefully next year we’ll resume our slow-paced, nostalgia filled relationship.

Garlic Soup with Harissa
From Yotam Ottolenghi’s Plenty

For the harissa

1 red pepper (or 3 small)
1/2 tsp each coriander seeds, cumin seeds and caraway seeds
1/2 tbsp olive oil
1 red onion, peeled and chopped
3 garlic cloves, peeled and chopped
2 red chillies, seeded and chopped
1/2 tbsp tomato purée (or tomato paste)
2 tbsp lemon juice
2-3 tsp coarse sea salt

For the soup

3 T butter
2 T olive oil
4 medium shallots, finely chopped
3 celery sticks, finely diced
25 garlic cloves, finely sliced
2 tsp chopped fresh ginger
1 tsp fresh thyme, finely chopped
1/2 tsp coarse sea salt
3/4 c white wine
1 generous pinch saffron strands
4 bay leaves
1 quart good-quality vegetable stock
4 tbsp parsley, roughly chopped
Fresh cilantro, roughly chopped
Greek yogurt or Crème fraîche (optional)

First make the harissa: put the pepper under a very hot oven broiler until blackened (10-20 minutes, depending on your broiler). Transfer to a bowl, cover with plastic wrap, leave to cool, then peel and discard the skin and seeds. While the pepper is roasting, place a dry frying pan on a low heat and toast the coriander, cumin and caraway for two minutes. Transfer to a mortar and grind to a powder. Heat the oil in a frying pan and fry the onion, garlic and chillies over medium heat until dark and smoky – six to eight minutes. Then blitz all the paste ingredients together in a food processor.

For the soup, gently fry shallots and celery until soft and translucent (about 10 minutes). Add the garlic and cook for five minutes more. Stir in ginger and thyme, add salt, pour in the wine and leave to bubble for a few minutes. Add the saffron, bay leaves and stock, and simmer for 10 minutes. Remove the bay leaves, add the parsley and blitz with a hand-held blender. Do not over-process – keep some texture.

Serve in shallow bowls. Swirl in some harissa, sprinkle over coriander and serve with a dollop of Greek yogurt or Crème fraîche, if you like.

garlic-soup

sweet perk

September is looking up. Not only is it National Yoga month, it’s also National Honey month. Hard to go wrong with either one in my book. Oddly enough, they generally go hand in hand for me. My back typically needs a dose of yoga after slinging around fifty pound boxes of bees and honey. Beekeeping is a weird balance between delicate finesse and sheer brawn.

Overall it was a pretty quiet summer in the bee yard. Nothing compared to last summer’s drama. Since I started the season with two young hives, my main goal was to grow each hive from one box of bees into three so they will be ready for a long Wisconsin winter. Things got off to a painfully slow start. Cold weather kept the bees a solid month behind schedule. I conceded early on that there would not be much of a honey harvest this year. Leaving it instead for the bees’ winter supply.

full-house

I got my new bees from my good friend Kris at Wild Girl Farm, but the queens came form neighboring apiaries in northern California. Queen Hallie Frances has a two week head start on Queen EB and it showed all summer long. Hallie’s hive hit a population boom at just the right time. When the Basswood stared blooming, she had a fleet of foragers ready to go in full force. They started packing so much nectar into their hive, it caused me to reconsider my decision not to pull any honey off.

This was in July, and Hallie Fances’s girls were just outgrowing their second box. I needed to decided quickly if I wanted to add their third hive box, or put on a honey super instead. I did a mental flip through the calendar, calculating how much time they would have to fill a third hive box if I interrupted things with a honey super. And then there was the question of what kind of honey super. I could give them drawn out comb that would later be run through the honey extractor, or I could put on some thin sheets of beeswax, letting them draw it out and make cut comb honey instead – a riskier and slightly more intensive undertaking.

I say “riskier” because in my experience, having bees successfully produce comb honey takes a certain sort of hive. They have to be strong, willing, and ready. And the hive needs to be managed in such a way that they have just barely enough room. Not so cramped that they’ll want to swarm, but tight enough so they don’t get all willy-nilly about their cut comb project. Some hives have what it takes and some hives don’t. Enough failures and successes have taught me to spot good candidates.

I love honey in any form – raw, baked into things, creamed – but pure comb honey is my favorite. The comb is imbibed with enzymes, traces of pollen, and subtle floral essences, all providing an extra richness and depth of flavor. And it adds a versatility that bottled honey lacks. You can slice it, crumble it, spread it, and above all – chew on it. Back in the old days cut comb was the honey product of choice. In fact there is even a historical “comb honey” era on the books from about 1880 to 1915. There were no Pure Food and Drug Laws in the U.S. until 1906 – which meant that a lot of bottled honey was spiked with corn syrup, which also meant a lot of consumers avoided it, opting instead for pure cut comb. No filler added.

honey comb

I sat down to consider my options, watching the rush hour traffic come and go from Hallie Frances’s hive. The girls were practically radiating determination. And that did it. I decided to hedge my bets and go for the gold. I got up and went for the cut comb super I had waiting in the car.

And sure enough, they took to their cut comb duty head-on, drawing it out, packing it full, and capping it over – all before the Basswood flow even finished. Rockstars. I slipped the comb super off and replaced it with their third hive box before I left on our annual Boundary Waters canoe trip. And now their third box is nearly packed full, ready for winter.

Queen EB never quite caught up with her roaring neighbor, but her girl’s held their own. They are just shy of 3 boxes, and will most likely spend the winter in 2 deep and 1 shallow box, which should do the trick. But the best part about both hives is their chill attitude and sunny disposition. When I slide their inner covers off, they generally buzz up, like old friends, glad to see me. One of the sweet perks of keeping bees.

cut-comb

Eating Cut Comb Honey

As-is: cut off a chunk and chew on it. It’s great for a simple after dinner sweet, or if you need a mid-day energy boost. After the honey is gone, the wax will turn into an almost everlasting piece of gum that you can chew and spit out whenever. If you chew long enough, it will slowly start to dissolve. Some people advocate it’s quite good for you.

Thinly sliced: use a pairing knife to cut thin slices. Add to cheese and fruit plates plates. Blue cheese on a thin cracker topped with honeycomb is excellent. As is a crisp pear slice with ricotta and honeycomb. Cheddar, fresh jalepeño slice and sliver of comb honey is another winner. Manchego and Granny Smith? The possibilities are endless here people!

Spooned/Crumbled: over hot cereal with a dab of butter. Fall mornings never looked so good.

Spread: onto warm buttered toast. The comb and honey will melt into deliciousness all over your toast.

goodness-sake comb honey box

pickle defeat

When my Grandpa Orville retired from corn and soybean farming, he moved into town and started cucumber farming. That’s what retired farmers do. They find a way to keep farming. He had ten or so acres of cucumbers that he grew for Gedney Foods. Gedney must have put their feelers out, because he wasn’t alone in this venture. Cucumbers were the hot thing in south central Minnesota during the 1980’s.

orville

Orville’s place eventually became the neighborhood grading station. Every night after picking, he’d fire up the rickety grader and trucks from around the area would start rolling in to have their harvests weighed and sorted. It was mesmerizing to stand at the edge of the conveyor belt and watch hundreds of cukes bobble along, gradually dropping off into their designated bushel baskets below. My favorites, of course, were the miniatures – the ones that got turned into crunchy “baby dills.”

My brother was partial to the big yellow hogs – the ones far too overgrown for anything useful beside chucking at random objects (sisters excluded). He was a master at firing them onto the tines of farm implements. Ah, to sit in the cucumber shed next to your big brother, drinking a cold Bubble Up, and be carefree again. Take me back.

When my brother and I got a little older, someone in our family (no doubt our father) decided it would be a good experience for us to try our hand at farm labor. We were shipped off to Grandma and Grandpa’s on the Greyhound bus for a week of paid cucumber picking. I’m pretty sure this was my first ever real-life eye opening experience. Wow. Cucumbers have prickly spines. The sun gets really hot. There is no shade in a cucumber field. It matters when you get paid by volume. I was full of revelations that summer.

It became instantly clear that my brother and I were no match for the Mexican laborers we worked beside. Their stamina was unbelievable. And they didn’t even wear the silly gardening gloves that I fussed with – on and off, on and off. But unlike me and my brother, who were working for pocket change, they were working to support their families. Kids much younger than us were putting in full, hot days. And they were always laughing to boot. I acquired an early admiration for immigrant farm workers.

I don’t know if it’s still the case, but according to the history page on Gedney’s website, they were rejecting machine-picked cucumbers as late as 1988. That was also the year, incidentally, they declared themselves the official source of “The Minnesota Pickle.” Does every state have an official pickle? Things to ponder the next time you bite into a kosher dill.

cukes

My whole adult life I’ve wanted to be a pickler. A really good pickler. Every sumer I embark with enthusiasm on major pickling projects. Unfortunately what generally results is a load of poor, mushy pickles. Occasionally I’ve turned out some mediocre pickles. But I’ve never come close to the perfect pickle. I’ve tried so many methods and recipes that I’m almost ready to raise the flag of pickle defeat. Almost.

My only saving hope is that I can, without fail, make a relatively crisp and very tasty fridge pickle. I guess it is still considered pickling, but it always feels like cheating. I’d rather be skimming the film off the top of the crock in the cellar, or filling the larder with sealed jars. As it is, I have to settle for cramming as many quart jars as I can into the fridge every fall, knowing my tangy slices will keep well into the winter.

I’ve adapted my recipe over the years to use honey instead of white sugar, but either one works. If you’re using honey, make sure that it is nice and viscous, without a trace of crystallization. You can even warm it gently if you’re in doubt. This ensues that it won’t solidify later in the chilled brine.

Sweet and Tangy Fridge Pickles

1 1/2 cups honey (runny and viscous) or 1 1/2 cups white sugar
2 cups vinegar (white, cider or a mix)
1/4 cup kosher salt
3/4 scant teaspoon turmeric
3/4 scant teaspoon celery seed
3/4 scant teaspoon mustard seed
2 small onions, thinly sliced
20 or so 4-5″ cucumbers (about 3 pounds)

Scrub the cucumbers well and refresh for a bit in an ice water bath.

While your cukes are cooling, mix honey, vinegar and spices. Do not heat (if you warmed the honey to liquify it, let it cool before you brine the cukes).

Trim the blossom end from cucumbers, and peel alternating stripes, leaving some of the peel intact. Dice into chunky coins. Mix sliced onions and cucumbers together. Pack into 2 clean quart jars. You may need to start a third jar, but as the vegetables settle and brine, they will shrink a bit, allowing you to pack more in.

Pour the room temperature brine over cukes. Seal with lids and let rest in fridge for a few days before eating, turning jars occasionally to mix brine and spices. You can keep adding fresh cucumbers to the jars when there is room. Pickles will stay crisp and flavorful for several month in fridge.

pickles


instapig

No Instagram images were found.