Archive for the 'sauces, salsas, preserves' Category

crafty devil

Whooboy! There are loads of reasons why the pig pen has been so quiet this past year. I’ll refrain from inundating you with the nitty-gritty details of my life. But I will tell you this. My kitchen routine has been turned every which way and has temporarily landed on smack on it’s head. Not in a bad way, but enough to leave me feeling a little discombobulated.

aip waffle

This spring and summer I got hot and heavy into Ayurvedic cooking  (and lifestyle shifts). Which means I was inviting more of a mind-body-spirit connection into my kitchen. I was concentrating on bringing all six flavors—sweet, salty, sour, pungent, bitter, and astringent to each meal. I was trying to make lunch, rather than dinner, my heartiest meal of the day. My cooking got simpler. Indian influences took over my pantry with things like curry leaves, mung beans, and moong dal lentils. Certain foods, like garlic, tomatoes, and hot peppers were reluctantly set aside to enjoy during cooler times when my body would be more willing to digest them. It was, and somewhat still is, quite a fun experiment.

By October, however, I was immersed in a whole new lineup of blogs and cookbooks. What started as an act of desperation to help my best friend (and husband) get an upper hand on living with chronic Lyme and chronic fatigue has become a full-on lifestyle change for both of us.

Say hello to the Autoimmune Protocol. A meal plan that is essentially a slightly more restrictive version of eating paleo. It’s a nutrient dense diet, which means heaps of (most) vegetables, grass fed meat, seafood, and organ meat. It also eliminate foods that potentially cause inflammation and therefore disease—which, as it turns out, is a hell of a lot of food. This is especially noticeable if you heart longs towards vegetarianism. The last of my mung beans and lentils are pathetically lingering at the bottom of their jars.

So why even get onboard with such a crazy extreme diet? A couple reasons. Solidarity and keeping the cooking streamlined are the easy answers. But the more research I did on autoimmune disease, the more I started asking some sticky questions.

Haven’t I suffered from Raynaud’s disease (an autoimmune circulatory issue that causes extremities to turn impressive shades of white and blue) all my life? Don’t I have an eye virus that has a tendency to run rampant, even while on medication to suppress it? Haven’t at least four eye doctors told me I have an immune response that’s causing my poor left eye to destroy itself? And, oh yeah, haven’t I been on a steroid drop for over fifteen years to combat inflammation in that eye? It’s funny the things we can overlook in life, isn’t it?  Denial is a crafty devil.

As is autoimmune disease, I’m learning.

All this to say, I finally came round to the fact that, yes, just maybe, my body is struggling with autoimmune issues. So I embarked on this radical diet with a half-skeptical “it certainly can’t hurt” approach. For years I have longed to reduce and even quit my eye medications, but such attempts always end in trouble. Maybe this will be my ticket.

So far this new way of eating has been a roller coaster with every high, low, bump, and twist I can think of. Honestly it’s been a little exhausting—both emotionally and simply with the amount of time I spend grocery shopping and cooking—it’s a very fresh diet, not a lot of dry staples on the pantry shelves. But my intrigue behind the science of the diet is high enough to keep me on the ride. 

It also helps that there are some incredibly creative autoimmune cooks to draw inspiration from. I’ve learned to use cauliflower and winter squash in ways I never imagined. A food processor works magic on both—think fried rices and risottos. My toaster has not seen a slice of bread in months, but instead thick slabs of sweet potatoes toasted several times over. I top my “toast” with all sorts of things, but it makes for an unbeatable leftover turkey sandwich with avocado a dab of cranberry. I’ve finally perfected Sunday morning waffles using a base of cassava flour (a starchy root) and apple sauce. Coconut flour and arrowroot crust pizzas topped with things like figs, prosciutto, pears, and arugula come out for special occasions. And I even managed to make a tray of gingermen for the holidays. The dough was a little finicky, but what the men lacked in appearance, they made up for in flavor, rivaling even Grandma Myrtle’s recipe.

gingermen

Clearly I am not suffering for lack of food. But this has been a dramatic shift in the way I shop, cook, and eat. And oddly, I haven’t felt like writing much about it. It feels too new, too uncertain, and too raw. Sometimes I’m convinced this is the wisest eating path I’ve ever taken (and there have been many) and other days I wonder what in the world I’m doing and why can’t I just be normal for god’s sake?

I’ve also been wrestling with my identity in the kitchen. One glance at my cookbook shelf can send me into a tailspin of despair. Until I remember I can still open them, make adjustments, and garner ideas. And the protocol does allow for trying to reintroduce a wider variety of foods as you progress. Which is comforting. Extremes make me nervous. So I tend to think of this as the first chapter in a long book. Here are my cliff notes to date

  • the quality of meals has been off the charts
  • the prep time and planning required is also off the charts
  • being thankful for the first and accepting of the second is key
  • humans bodies are so responsive to the things we do and do not put into them
  • understanding and aligning with this makes any shift in diet way easier

And if nothing else, I’m learning a great deal about myself and how I approach healing. My no nonsense, type-A personality makes me a very good rule follower. Give me a recipe, hand me the instruction manual, tell me what to do. I will follow it to a tee to get the results I’m after. Discipline is not my problem. It’s my white knuckle grip to succeed that gets in the way. And even though I can rationally tell myself that this strategy isn’t at all useful, truly letting go and easing up is still a daily challenge. And that’s exactly where I’m at. Trying to relax back from what’s supposed to happen and opening my heart to what is. 

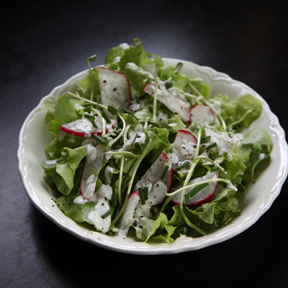
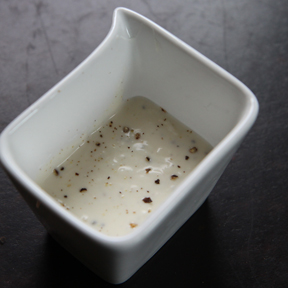
I’ve cooked some spectacularly delicious meals over the last few months. Not surprisingly, some of the simplest things are standouts. Like these two dressings. The honey balsamic is fantastic tossed with a salad of sturdy greens and warm roasted root vegetables. It’s also great on fruit based salads. I use the avocado dressing on slaws, dotted on fish and chicken, and as a dipping sauce for just about anything. Onward ho!

Honey Balsamic Dressing
(from The Healing Kitchen)

1/2 cup olive oil
1/4 cup balsamic vinegar
2 tablespoons honey
1/2 t sea salt

Combine all in a jar and shake well. Keeps well for several days covered in the fridge (makes 3/4 cup)

Olive-Avocado Dressing
(from the Autoimmune Paleo Cookbook)

1 avocado, pitted and skinned
1/3 cup olive oil
1/3 cup water
2 teaspoons cider vinegar
1 tablespoon fresh lemon juice
1/4 teaspoon salt

Combine all in a blender and bend until smooth. Thin with a little water if it’s too thick. Keeps for a day or two covered in the fridge. (makes 1 cup)

aip waffles!

zing pow

Well hello! It’s been a while, no? I’m struck with a pang that this little piggy may have been written off as just another blog, dying a slow, bloggy death. But I hope that’s not the case. I’ve thought a lot about this space and what I want it to be. I’ve wrestled with trying to make it a “real” blog, but I’m not sure I have the drive for that. And maybe that’s okay, because honestly what resonates most about this place is simply that. It’s just a place. A place to write a casual note to a friend. And if the friend is lucky, maybe a recipe at the end. So if you’re good with such a note, however random or regular it may be, climb aboard. I’ll do my best to keep in touch.

Now. Lets get on to the business at hand. Bears. Friendly ones.

It’s hard to say where my loyalties laid as a kid. The happy-go-lucky, bumbling Pooh, or the exceptionally polite Paddington? They both have their merits. But lets talk about Paddington. Paddington has a suitcase with a secret compartment. This trumps an empty honey pot in my book. Well mannered, yes. But still not above pulling out his Very Hard Stare for those he disapproves of. I’m here to tell you—a well applied Very Hard Stare can take you places. And then there’s the marmalade sandwiches. How can you go argue with a bear who keeps a marmalade sandwich tucked under his hat? You can’t.

maramalade toast

After becoming fully acquainted with the bear in the blue duffel coat, I desperately wanted to love marmalade. But my 10-year-old pallet just wouldn’t go there. All those peels! And the bitterness! I knew Paddington must be onto something, but I couldn’t exactly figure out what. Though not for lack of trying, my distaste of marmalade lasted through most of my adult life. Until just a few years ago when I half-heartedly tapped into a jar of Lucia’s grapefruit marmalade. There I was one cold January morning when every last bit of wintery sunshine came hurtling though my kitchen window and landed smack dab on my piece of crusty, buttery toast. Zing pow. I get it Paddington. Finally!

Lucia’s is a long-standing favorite restaurant in uptown Minneapolis. It’s one of those comfortable places that you can’t bare to leave without buying some sort of treat to take home. My inner Paddington must have prompted me to pull a jar of marmalade off the shelf one visit. And that was it. My love affair with marmalade, or at least Lucia’s grapefruit marmalade, was set. It became a staple in my Christmas stocking. One bitter-sweet jar to be enjoyed in the bitter-sweet cold. It just had this way of evening everything out.

You may have noticed that I’m talking about Lucia’s grapefruit marmalade in the past tense. This year’s Christmas stocking was filled with many delectable items, but Lucia’s grapefruit marmalade was not one of them. “They don’t make it anymore,” is what my mom claimed when grilled about its absence. (I knew she had stopped there because Earl was the lucky recipient of a sack of Lucia’s peanut butter dog biscuits.) I was stunned. January will be okay, I thought. I’ll make it through without a jar of marmalade.

I made it precisely twenty-two days into January without a jar a of Lucia’s grapefruit marmalade. On the twenty-third day of January, the cold and endless grey skies left me no choice but to google “grapefruit marmalade recipe” and subsequently procure a few pounds of ruby red Texan grapefruit.

Having relied on Lucia for the entirety of my marmalade obsession, I was a little uncertain of my marmalade making prowess. And I’m not sure what I did actually constitutes genuine marmalade, as there was no overnight macerating as many of the recipes call for. But the recipe I finally settled on, via the New York Times, claimed marmalade, so I went with it. It also promised little “bursts of Meyer lemon” which is what ultimately swayed me.

Despite the lack of maceration, it was still a rather time consuming process, albeit a cheery one. Watching pink and yellow and sweet all meld into one was a nice cure for the winter blues. Though my level of skepticism remained high the entire time the fruit was simmering. I was seriously doubting that the water would cook off in time, but by some miracle, it did. Marmalade magic.

grapefruit marmalade in the making

I jarred up my marmalade, dubious (again) about seals forming without a proper hot-water bath. But every jar sealed. Everyone except the one I didn’t even bother putting a lid on. I think I might have eaten half the jar before even attempting to make a piece of toast. This magical concoction would also be a great compliment on a cheese plate, with brie and blue, maybe a pear and a few pecans. And, it’d be quite nice, I imagine, with roast pork or chicken. And on a turkey sandwich. Or just by the spoonful.

Having never attempted marmalade, I stuck to the recipe below pretty closely. Though I did halve it, and I also cut back on the amount of grapefruit peel. I was worried that the addition of bits of Meyers lemon with their peels might result in a peel overload. I also upped the quantity of grapefruit just a bit. My advice is to prep the peel called for and then play it by ear. Once it’s all in the pot, you can get a better sense of how peel intensive it will be. In retrospect, I still would have cut back, but maybe not quite as much as I did.

And yes, making marmalade is a process that is worth its time. Ask Paddington.

Grapefruit and Meyer Lemon Marmalade
(from June Taylor of Still-Room, via the New York Times )

5 pounds grapefruit (strong vote for organic here)
5 Meyer lemons (again, organic is best)
½ cup lemon juice (from 2 to 3 additional lemons)
2 ½ pounds sugar

Remove the grapefruit skin with a vegetable peeler. Cut the peel into 1/8-inch slivers; stop when you have 3/4 cup. Discard the rest. Slice off the ends of the grapefruit and the remaining grapefruit peel and pith. Remove grapefruit segments, reserving membrane. Stop when you have 5 cups of segments.

Cut the ends off the Meyer lemons, deep enough so you can see the flesh. Leaving the peel on, remove the segments of lemon and reserve the membrane. Cut the segments crosswise into 1/4-inch pieces. (I found this to be the trickiest part. Use a small paring knife to cut the lemons so you can detach the membrane while still leaving the fruit attached to the peel.)

Put membranes from the grapefruit and Meyer lemons in a jelly bag and tie closed.

In a wide and deep pot, combine the grapefruit segments, grapefruit peel, lemon pieces and jelly bag. Add lemon juice and 2 1/2 cups water. Simmer until the grapefruit peel is tender, 25 to 30 minutes. Let cool.

Preheat the oven to 225 F. Working over a bowl in your sink, squeeze the liquid from the jelly bag; keep squeezing and wringing it out until you extract 1/3 to 1/2 cup of pectin. Add pectin and sugar to the pot. Place over high heat and boil, stirring now and then, until marmalade is between 222 and 225 degrees and passes the plate test. (Spoon a little onto a plate and put in the fridge for 3 minutes. If it thickens like jam, it is done.)

Meanwhile, put 6 sterilized 8-ounce canning jars and lids on a baking sheet and place in the oven. When jam is done, remove jars from the oven. Ladle jam into the jars, filling them as high as possible. Wipe the rims. Fasten the lid tightly. Let cool. If you don’t get a vacuum seal, refrigerate the jam. (Makes 6 8-ounce jars)

grapefruit marmalade

for what it’s worth

Well, here we are. A solid week into daylight-saving time. A nice indicator of spring for sure, but other than that, it’s a practice I’m not fond of. The only foreseeable gain is that it keeps my 18 year old cat Hoops hoodwinked for a good week or two. Which means I get a reprieve from him standing on my head in the morning. For an old guy he keeps pretty good time He knows exactly when breakfast is.

I’m one of those people who needs all the help they can get in the morning. Just when I’ve thought I’ve made it through the worst of it, right when rolling out of bed starts getting bearable again, they go and take away the light. Moving this extra light to the end of the day only gets me into trouble. “I don’t need to start cooking yet,” I think “look how high the sun is in the sky!” Which inevitably leads to sitting down to a late dinner, missing my bedtime, and making the next dark morning all the more difficult. It’s a vicious cycle. Why can’t we just leave the light where it belongs?

There. That’s my rant.

sunshine

It seems like we’re on the fast track to spring though, which means we should talk about rutabagas. Because before we know it social norms will dictate putting away the wool and pressing our whites, shuffling the bourbon bottle to the back of the cabinet to make room for the gin, and rutabagas being forced to take a back seat. I know. Try to hold yourself together.

Here’s the thing to remember about rutabagas. They’re humble. They remind you exactly where you are. And food that is humble is food that lets you surrender—the meals that evoke a sigh and tell you it’s okay to give in. You know how certain foods keep you thankful and hopeful, all at the same time? A rutabaga can do this.

I know this because my winter Hermit Creek Farm share is keeping me well endowed with rutabagas—a vegetable that I might otherwise be accused of overlooking. But to my credit, I’m not alone in this. Turns out there is a lack of rutabaga recipes. I scoured the classics (The Joy has an excellent Winter Root Vegetable Braise) and rifled my collection of old church basement cookbooks (rutabaga puree with cream is the most popular), but overall, the pickings were pretty slim.

rutabagas

Recognizing there are only so many roads to go down with an unflappable root vegetable, I’ve been hell bent on being creative with my stash. And here’s what I’ve learned in my rutabaga trials. Dijon mustard, maple syrup, and cream are a rutabaga’s three best friends. You can pretty much do anything to a rutabaga, and as long as you add one (or more) of these players, things will go just fine.

The church ladies were indeed onto something. It’s hard to beat a plate of mashed rutabagas with a little cream and maple syrup folded in. Cube up a rutabaga, braise in a skillet with a bit of water, and when the cubes are tender and the water is evaporated, mash them up with a fork or hand blender, adding cream, maple, salt and pepper to taste. This will make any long day will feel better, I promise.

My most recent, and fanciest undertaking was rutabaga pancakes. Which is really just a riff on potato pancakes. Only I traded onions for apples and added a handful of Gruyère cheese. Heading my rule, I also made a simple maple mustard cream sauce.

If you need some prodding to actually seek out a rutabaga, this is it. There’s still time. We’re pushing it, but bringing roots into the kitchen is still proper etiquette. Either way it’s worth it. Worth it to watch this underdog of a vegetable knock it out of the park. Worth it to put such a simple food on the table. And worth it to be reminded of our very good luck, as tenuous as it can sometimes feel. 

rutabaga cakes

Rutabaga Pancakes

1 pound rutabagas, peeled and grated
1 small apple (or half of a large one), grated
1 teaspoon salt
few grinds of pepper
3 scallions, chopped
handful of grated cheese, Gruyère or other (about 2 ounces)
2 small eggs (or one jumbo), beaten
3 tablespoons potato starch
rounded 1/8 teaspoon baking powder
vegetable oil, for frying
scallions, for garnish

hot smoked paprika, for garnish

Maple Mustard Cream Sauce

3/4 cup heavy cream
1 tablespoon Dijon mustard
1 tablespoon maple syrup

Mix the grated rutabaga and apple together in a medium bowl. Add the salt and pepper, working it in with your fingers a bit to help release some juices. Stir in the scallions, cheese, potato starch, and baking powder. Fold in the eggs and mix well.

Pour a healthy slick of oil in a skillet over medium heat. When the oil is hot, use a large spoon or 1/4 cup measurer to drop batter in. Lightly press out the cakes with a spatula, and cook about 4-5 minutes on each side until golden and crisp. Transfer to a paper towel lined plate. Wipe out skillet between batched and repeat, placing a fresh paper towel on the stack of cakes.

For the sauce, bring the cream to a light boil in a heavy sauce pan, letting it cook down about 5 or so minutes until it is slightly thickened. Remove from heat and stir in Dijon and maple syrup.

Serve cakes warm, drizzled with sauce, scallions, and a pinch of hot paprika. Makes about 12 cakes.

*These also reheat well in a warm oven. And, they’re even good cold. Like when you’re running out the door in the morning, late, and haven’t had time for a proper breakfast.

raw reality

Man. Does this happen every April? I am in a funk to beat all funks. (Ask me if the latest streak of grey, 25ºF, damp days is helping.) But, I shouldn’t complain. At least I’m cozy and well fed. Which is more than I can say for my neighborhood deer friends. They are, in a word, frantic. This year’s snow came early and stayed late. It’s not uncommon to find 5 or 6 deer piled together in a patch of bare ground the size of a hula hoop. Nor is it unusual to see them darting across roadways or staggering into the streets, looking dazed and drunk from hunger. 

lake-superior-in-april

Their erratic behavior has put me on high alert during my daily commute. “Must not smuck deer friends, must not smuck…” is my new driving mantra. My 26 year career behind the wheel has been a lucky one. I’ve had relatively few run-ins with cars or wildlife. But the few times I have is enough to make me want to turn in my keys for good. It’s awful. And gut wrenching.

Even more so, I learned last week, if you are driving in a post-yoga class, blissed out state of mind. I was nearly home, feeling triumphant, having successfully made it through the white knuckle stretch Mark and I call “deer alley.” But on my very last hill I found myself simultaneously slamming on the brakes and veering into a snow bank. There was the horrible, unmistakable thud and my eyes locked with a deer’s – inches from my windshield. We tied, I’m sure, for whose eyes held the most panic.

While I was busy plowing into a snow bank, the deer managed to bounce off my front end, stumble, and miraculously dart back into the woods. And just like that, it was over. We all survived (I hope) but my bliss meter had gone from full to empty. I limped the rest of the way home, feeling helpless. It doesn’t matter the circumstances – causing harm to anything makes me feel like I have way overstepped my bounds.

Mark reminded me that deer are tough and resilient. He said I’d probably be more stiff and sore in the morning than the deer. And he might have been right. Then he went back to collect missing car parts. I rummaged through the freezer to try and pull something together for dinner. Still thinking of the deer, I was feeling especially blessed that I have a freezer of food to rummage through. I pulled out a carton of last summer’s sweet corn and a half used bag of chick pea flour.

fritter-spice

Sweet corn fritters via the River Cottage VEG cookbook just might do the trick. Fast, lightly fried, mildly spicy, all with a tinge of summer sweetness. Unapologetic comfort food. As I was dropping the first round of fritters into the fry pan, my e-mail pinged at me. I absentmindedly perused my inbox and for the second time that night was jolted into a raw reality. The message was from a life-long friend. It was surprisingly upbeat given the terribly sad and tragic news it contained. I felt hot tears on my cheeks. Fritters were not, after all, going to do the trick. I kept my post at the stove anyway. But with an incurable knot in my stomach.

The deer, and quite obviously my friend, have stayed with me all week. I’ve been wrestling with things that I don’t understand. Big emotions that have no cure. My only solution has been to try and practice santosha – one of the guiding principles of yoga that roughly translates to experiencing contentment in any situation. Not just under mundane circumstances, or even easier, during situations that generally make us happy – but any time, and all the time. Not so easy when we’re uncomfortable and scared. Yet attempting to find this unconditional peace – by sort of settling and breathing into the sadness, is the only thing that has brought me solace this week.

corn-fritters

My unending gratitude to the instructors at Humble Be Yoga who continually fill me, both physically and spiritually.

Sweet Santosha Corn Fritters
Adapted from Hugh Fearnley-Whittingstal’s River Cottage Veg

1 1/4 cups chickpea (garbanzo bean) flour
1/2 teaspoon baking powder
2 teaspoons ground cumin
2 teaspoons ground coriander
1/2 teaspoon ground turmeric
dash of ground cayenne pepper
pinch sea salt
10 ounces frozen sweet corn
3 green onions, chopped
handful of fresh cilantro, chopped
1 jalepeño chopped, with seeds if you like heat
1/3 cup plain kefir (or milk)
1/3 cup water
Canola or peanut oil for frying

Cilantro Raita

3/4 cup plain greek (or thick) yogurt
2 1/2 ounces soft goat cheese (chev)
small bunch of fresh cilantro, chopped
flaked sea salt and peeper to taste

Combine the raita ingredients and let sit.

For the fritters, sift together dry ingredients into a bowl. Add remaining ingredients, except kefir/milk and water. Mix well and slowly stir in the kefir and water until there are no lumps.

Heat about a 1/2-inch of oil in a heavy skillet over medium high heat. When the oil is hot, drop spoonfuls of batter into the oil. Don’t overcrowd the pan – the fritters shouldn’t touch. Cook about 2-3 minutes on each side. Remove and drain on a paper towel while continuing to cook remaining batter.

Serve warm, toped with a healthy dollop of the raita and sriracha or tabasco. (serves 4)

*A few notes: you can also use fresh mint for the raita. For the fritters, it is worth seeking out the chickpea flour. The nutty favor of it works magic with the sweet corn and spices. Bob’s Red Mill brand is pretty widely available. You can also use all kefir, all milk, or all water for the liquid. I love the extra tang that kefir adds.

santosha-bowl

root redemption

Well, it’s happened. I’ve reached the stage in winter where I simply can not bear all the layers I put on to keep warm throughout the day. This longing to shed my wool tights and polypro zip-ups for loose, flouncy clothing crops up every year. But this year’s feeling of bulky, confinement has arrived substantially earlier than usual, which is troublesome. There’s a lot of winter left up here in Northern Wisconsin. This past week has left me desperately rooting through my wardrobe for signs of hope. My kingdom for something gauzy and peach.

rooty

On Saturday I took my gloom into the kitchen and decided to rummage through the crisper drawer instead. I was reminded that it can get pretty bleak in there this time of year too. My hands had landed on a couple of castoffs. Two large, lumpy softball size rounds of celery root. They’ve been loitering in there far too long. One arrived in December and the other made it’s way into the drawer in early January. Both came as part of our monthly winter CSA share from Hermit Creek Farm. I keep meaning to shred them up for the crown jewel of a wintery salad, but somehow they’ve eluded me. I displayed them on the counter for inspiration. That’s when it hit me. All these confining layers and lack of sunlight. I feel just like a piece of celeriac. Bulky, pale, gnarled, and in the case of these two particular roots – dejected.

I could overcome this, I thought. It was -12ºF after all. What else did I have going on? I turned to scan my cookbook shelf. I pulled out a few dead ends before my eyes landed on Vedge – a relatively new book in my collection given to me by my friend Julie. An exciting and appropriate addition to my shelf as I reembark on vegetarianism. Written by the owners of the of the Philadelphia based restaurant of the same name, the book is filled with  wildly stunning combinations. There is no doubt that Rich Landau and Kate Jacoby are passionate about their vegetable. Vedge offers up no less than four celery root recipes.

celery root

I decided on Celery Root Fritters and Rémoulade – two vastly different preparations of the same vegetable. I was intrigued. It sounds fancy, and it even looks fancy, but it was a cinch to prepare. The recipe makes an insane amount of rémoulade (a classic French mayonnaise based sauce) but I was okay with this. I put it on everything for the next three days – toast, mashed potatoes, giant white beans, I even crowned a wintery salad with it. The rémoulade was such a bright addition to my winter staples. I’d make this recipe again in a heartbeat (more celeriac please, Hermit Creek Farm!) and I wouldn’t adjust the quantities one bit.

Be warned however, that even after you free the celeriac of its knobbly exterior, you’re still left with a pretty sad looking vegetable. I was feeling dubious at best. But I forged on, encouraged by the gorgeous photos in the book.  I served our fritters over a bed of wild rice (also courtesy of our Hermit Creek Farm winter share – have I mentioned how much I love my farmers?) with some simple greens. I sat down and lit the substantial pillar candle that graces our winter table for months on end. And I felt redemption. If a lumpy, dull celery root can undergo such a worthy transformation, isn’t there hope for all of us? Perhaps there’s more significance to the need for endless layers than meets the eye. Let’s hope.

friiters!

Celery Root Fritters and Rémoulade
(From Landau and Jacoby’s Vedge)

Rémoulade:
2 cups peeled, grated celery root (1 pound)
(a shredder attachment on a food processor works great for this)
1/2 cup mayonnaise (vegan or regular)
4 cornichons
2 tablespoons capers (salt brined if possible)
1 tablespoon dried dill (or 2 tablespoons fresh)
2 tablespoons Dijon mustard
2 tablespoons shallots, chopped

Blanch the grated celery root in a pot of salted, boiling water for about 5 minutes. Drain well, squeezing out any excess moisture as it cools. Meanwhile, combine the remaining rémoulade ingredients in a food processor and pulse to combine into a chunky, but creamy mixture. Transfer to a bowl and stir in the cooled celery root.

Fritters:
2 cups celery root, peeled and diced (1 pound)
1/2 cup onion, chopped
2 tablespoons olive oil
2 teaspoons salt
2 teaspoons black pepper

Combine and roast on a sheet pan in a 300ºF oven for about 20 minutes until tender. Remove and let cool slightly. transfer mixture to a food processor and blend until it forms a chunky paste. Form into 4 or 5 balls and flatten into discs about 1 1/2 inches thick. Set the fritters onto a piece of parchment as you go.

Coating:
Mix 1/4 cup chickpea flour (or substitute any other type of flour, but the chickpea adds great flavor) and 1 teaspoon Old Bay Seasoning (a favorite that I personally think no spice drawer should be without!) on a plate or shallow bowl. Dredge each fritter in the flour mixture and return to the parchment.

Heat 1/4 cup peanut or canola oil in a frying pan over high heat until the oil starts to ripple. Carefully place the fritters in the oil and brown each side for about 2 minutes. Once the fritters are golden brown, gently remove to a paper towel.

Serve immediately with a generous spoonful of rémoulade atop each fritter. Lovely over a bed of wild rice.

celeriac

october potential

Ouch. Normally October and I are fast friends. But this particular October has been something to recon with. This October took me in, chewed me up, and recently spit me out into a deluge of grey snow flurries. I’ll spare you the details, but do you want to know just how cruel October has been? I haven’t even planted my garlic crop yet. Terrible, I know. But that’s the beauty of garlic. It’s very forgiving.

October was at least kind enough to afford me a teeny bit of time in the kitchen. And there were some memorable moments to be sure. We had a surplus of fresh pressed apple cider this year, so I liberally took 2 gallons and slowly simmered it down to make 4 half-pints of an amazing boiled cider. It sounds extravagant, I know, to turn 2 gallons into 4 cups, but the result is worth it. The cider cooks until it turns into a thick, sweet-tangy syrup – somewhere between the consistency of maple syrup and molasses. I can’t decide how to use it first – spooned onto a cheese plate, glazed over roasted carrots or squash, mixed into a vinaigrette, or simply drizzled over vanilla ice cream. I’ll keep you posted on that as the winter wears on.

cider flow

Making boiled cider is really as easy as putting fresh cider in a heavy stock pot, bringing it to a boil, and then reducing the heat so it can simmer 4 – 5 hours. You really only need to give it an occasional stir until about the last 30 minutes. When it starts to thicken up, you want to stir more often to keep it from scorching. Remove it from the heat when the syrup gets to a consistency you like. That’s it – boiled cider. I went a step further and filled sterile jars and gave them a 15 minute hot-water boiling bath. But, like most concentrated sugars, this will keep almost indefinitely in the fridge, even without canning.

Then there was the night Mark came home with his sweatshirt bundled up and overflowing with fresh purple plums. We sucked down plenty of them fresh, but the stragglers got turned into a simple butter cake. My favorite fall cake – equally as good with pears, plums, or apples. And equally good, if not better, with coffee the next morning. That’s my kind of cake.

plums-in-a-pan

The other great thing about this cake is how fast and easy it is. Grease an 8×8 pan with butter and fill the bottom with fresh cut fruit. Melt 9 tablespoons of butter (it is a butter cake after all) and set aside. Mix 5 1/4 ounce (3/4 cup) sugar with 2 eggs. Add in 2 1/2 ounces flour (scant 1/2 cup) and 1 1/2 teaspoon baking powder. Stir in the melted butter and pour batter over fruit. Dust with a bit of nutmeg, cinnamon, or ginger if desired. Bake at 350º F for 40-50 minutes until cake is golden and crackly. See how much potential October has?

But I think the standout for the month was a garlic soup from Yotam Ottolenghi’s Plenty. The soup itself was simple, yet deceivingly rich and packed with deep flavor. But what really knocked it out of the park was the harissa garnish. It gives the soup just the right punch. For an even quicker meal you could sub in store bought harissa, but I wouldn’t recommend it. Yottam’s version is in the running for the finest harissa I have tasted. It’s well worth the extra 15-20 minutes of effort to mix it up fresh. It didn’t take me long to use up the leftovers – spooning it onto eggs, avocado toasts, and even a green arugula based pizza.

We had the soup as a meal with a big fall salad and sourdough for dunking, but I think it would make a particularly lovely first course for a dinner party. Twenty-five cloves of garlic may seem like a lot of work, but it’s really not too bad, especially if you don’t go and use teeny tiny cloves like I did and subsequently have to double the amount to 50. Careful use of a mandolin can make fast work of slicing perfectly thin garlic. As far as the stock and wine go, don’t skimp on quality – they really make up the flavor base of the soup. And the harissa! The harissa will become a kitchen staple for me, soup or no soup. It’s a tad on the salty side – which is one of the reasons why I fell in love with it, but if you’re leery of salt, start small and taste as you go.

toasty

Well there. I feel better for having gotten October off my chest. Hopefully next year we’ll resume our slow-paced, nostalgia filled relationship.

Garlic Soup with Harissa
From Yotam Ottolenghi’s Plenty

For the harissa

1 red pepper (or 3 small)
1/2 tsp each coriander seeds, cumin seeds and caraway seeds
1/2 tbsp olive oil
1 red onion, peeled and chopped
3 garlic cloves, peeled and chopped
2 red chillies, seeded and chopped
1/2 tbsp tomato purée (or tomato paste)
2 tbsp lemon juice
2-3 tsp coarse sea salt

For the soup

3 T butter
2 T olive oil
4 medium shallots, finely chopped
3 celery sticks, finely diced
25 garlic cloves, finely sliced
2 tsp chopped fresh ginger
1 tsp fresh thyme, finely chopped
1/2 tsp coarse sea salt
3/4 c white wine
1 generous pinch saffron strands
4 bay leaves
1 quart good-quality vegetable stock
4 tbsp parsley, roughly chopped
Fresh cilantro, roughly chopped
Greek yogurt or Crème fraîche (optional)

First make the harissa: put the pepper under a very hot oven broiler until blackened (10-20 minutes, depending on your broiler). Transfer to a bowl, cover with plastic wrap, leave to cool, then peel and discard the skin and seeds. While the pepper is roasting, place a dry frying pan on a low heat and toast the coriander, cumin and caraway for two minutes. Transfer to a mortar and grind to a powder. Heat the oil in a frying pan and fry the onion, garlic and chillies over medium heat until dark and smoky – six to eight minutes. Then blitz all the paste ingredients together in a food processor.

For the soup, gently fry shallots and celery until soft and translucent (about 10 minutes). Add the garlic and cook for five minutes more. Stir in ginger and thyme, add salt, pour in the wine and leave to bubble for a few minutes. Add the saffron, bay leaves and stock, and simmer for 10 minutes. Remove the bay leaves, add the parsley and blitz with a hand-held blender. Do not over-process – keep some texture.

Serve in shallow bowls. Swirl in some harissa, sprinkle over coriander and serve with a dollop of Greek yogurt or Crème fraîche, if you like.

garlic-soup

pickle defeat

When my Grandpa Orville retired from corn and soybean farming, he moved into town and started cucumber farming. That’s what retired farmers do. They find a way to keep farming. He had ten or so acres of cucumbers that he grew for Gedney Foods. Gedney must have put their feelers out, because he wasn’t alone in this venture. Cucumbers were the hot thing in south central Minnesota during the 1980’s.

orville

Orville’s place eventually became the neighborhood grading station. Every night after picking, he’d fire up the rickety grader and trucks from around the area would start rolling in to have their harvests weighed and sorted. It was mesmerizing to stand at the edge of the conveyor belt and watch hundreds of cukes bobble along, gradually dropping off into their designated bushel baskets below. My favorites, of course, were the miniatures – the ones that got turned into crunchy “baby dills.”

My brother was partial to the big yellow hogs – the ones far too overgrown for anything useful beside chucking at random objects (sisters excluded). He was a master at firing them onto the tines of farm implements. Ah, to sit in the cucumber shed next to your big brother, drinking a cold Bubble Up, and be carefree again. Take me back.

When my brother and I got a little older, someone in our family (no doubt our father) decided it would be a good experience for us to try our hand at farm labor. We were shipped off to Grandma and Grandpa’s on the Greyhound bus for a week of paid cucumber picking. I’m pretty sure this was my first ever real-life eye opening experience. Wow. Cucumbers have prickly spines. The sun gets really hot. There is no shade in a cucumber field. It matters when you get paid by volume. I was full of revelations that summer.

It became instantly clear that my brother and I were no match for the Mexican laborers we worked beside. Their stamina was unbelievable. And they didn’t even wear the silly gardening gloves that I fussed with – on and off, on and off. But unlike me and my brother, who were working for pocket change, they were working to support their families. Kids much younger than us were putting in full, hot days. And they were always laughing to boot. I acquired an early admiration for immigrant farm workers.

I don’t know if it’s still the case, but according to the history page on Gedney’s website, they were rejecting machine-picked cucumbers as late as 1988. That was also the year, incidentally, they declared themselves the official source of “The Minnesota Pickle.” Does every state have an official pickle? Things to ponder the next time you bite into a kosher dill.

cukes

My whole adult life I’ve wanted to be a pickler. A really good pickler. Every sumer I embark with enthusiasm on major pickling projects. Unfortunately what generally results is a load of poor, mushy pickles. Occasionally I’ve turned out some mediocre pickles. But I’ve never come close to the perfect pickle. I’ve tried so many methods and recipes that I’m almost ready to raise the flag of pickle defeat. Almost.

My only saving hope is that I can, without fail, make a relatively crisp and very tasty fridge pickle. I guess it is still considered pickling, but it always feels like cheating. I’d rather be skimming the film off the top of the crock in the cellar, or filling the larder with sealed jars. As it is, I have to settle for cramming as many quart jars as I can into the fridge every fall, knowing my tangy slices will keep well into the winter.

I’ve adapted my recipe over the years to use honey instead of white sugar, but either one works. If you’re using honey, make sure that it is nice and viscous, without a trace of crystallization. You can even warm it gently if you’re in doubt. This ensues that it won’t solidify later in the chilled brine.

Sweet and Tangy Fridge Pickles

1 1/2 cups honey (runny and viscous) or 1 1/2 cups white sugar
2 cups vinegar (white, cider or a mix)
1/4 cup kosher salt
3/4 scant teaspoon turmeric
3/4 scant teaspoon celery seed
3/4 scant teaspoon mustard seed
2 small onions, thinly sliced
20 or so 4-5″ cucumbers (about 3 pounds)

Scrub the cucumbers well and refresh for a bit in an ice water bath.

While your cukes are cooling, mix honey, vinegar and spices. Do not heat (if you warmed the honey to liquify it, let it cool before you brine the cukes).

Trim the blossom end from cucumbers, and peel alternating stripes, leaving some of the peel intact. Dice into chunky coins. Mix sliced onions and cucumbers together. Pack into 2 clean quart jars. You may need to start a third jar, but as the vegetables settle and brine, they will shrink a bit, allowing you to pack more in.

Pour the room temperature brine over cukes. Seal with lids and let rest in fridge for a few days before eating, turning jars occasionally to mix brine and spices. You can keep adding fresh cucumbers to the jars when there is room. Pickles will stay crisp and flavorful for several month in fridge.

pickles

key players

I’m hopelessly fickle when it comes to salads. One meal I fall hard for a fiery greek number studded with olives and the next I’m all about avocados laced with sprouts. Days later I’ll proclaim shaved asparagus with lemon and parmesan the best salad ever. I can’t help it. I’m in love with them all.

spring love

But if I absolutely had to pick my most treasured salad, it would have to be the first, no-frills lettuce salad straight from the spring garden. I change it up depending on what’s available, but my go to combination is a head of velvety buttercrunch lettuce tossed with thin radish slices and scallions.

I realize this is hardly a fair time of year to be making such sweeping declarations, but this one I can defend. Even when the sturdy greens of fall start rolling in, I’ll hold tight. A garlicky caesar based kale salad or romaine quarters tossed on the grill with crumbled blue cheese might give these simple inaugural spring salads a run for their money, but if push came to shove, I know which one I’d pick.

Spring is continuing to drag her feet on up into northern Wisconsin. We’ve barely seen a day over 50ºF in the last three weeks. My spinach and lettuce seedlings are perpetually stuck at 3 inches tall. So I nearly cried last week when I opened my highly anticipated Hermit Creek Farm “spring kick-start” CSA box and found all the key players. Gorgeous ruby radish globes, tall perky scallions, and a head of soft, papery thin buttercrunch lettuce. I think I actually had to sit down and catch my breath.

Of course with every salad comes the conundrum of dressing. Typically I am not a creamy salad dressing sort of person. I’ll take a vinaigrette or even just a squeeze of fresh lemon juice and coarse salt over a cream dressing almost any day. Mayonnaise and buttermilk hardly ever get involved. So it’s peculiar that my choice dressing for my proclaimed darling is cream. Almost pure cream. With just a splash of vinegar and pinch of sugar added. The sweet, tangy light cream makes a perfect shroud for spring lettuce. It’s creamy, but it’s delicate. It doesn’t overtake the greens – my number one rule with any dressing.

farmhouse dressing

You remember Grandma Myrtle? Well this was her go to dressing. I learned about this sweet little concoction from my mom, years ago and almost by mistake when we were in the kitchen throwing together a salad. It’s one of those simple unwritten recipes that so easily could have been overlooked and lost. Fortunately it has found its way into one more kitchen. I come back to it every spring with the arrival of tender lettuce. And I always think of Myrtle bustling about in her farmhouse kitchen.

Farmhouse Cream Dressing

2-3 tablespoons cream
1-2 tablespoons vinegar (I use rice)
1-2 teaspoons sugar
fresh ground pepper

Mix together and adjust flavors to your liking. Serve over fresh greens.

garlic report

I think it is  finally safe to say (bang on wood) that the weather has turned. There are still a few random snow piles, desperately hanging on for dear life, but the garlic patch is clearly visible. I’ve even managed to duck out of work an hour early a few nights this week and sneak off to the garden. It’s my favorite time there – when the light is all slanty and rich. I shake myself a small vodka gimlet, plunk in 3 hazelnuts, and pick out a few seed packets for the evening’s planting. My kind of happy hour.

happy-hour

Traditionally my sugar snap pea crop is in the ground no later than Tax Day. They almost always get a little snow at some point, but that’s the nice thing about peas – they don’t mind. I’ve never planted peas so late, but I finally got two rows in on Tuesday evening. It might be a lost cause if the weather turns too hot, too fast. But after mulling it over for about a half a second, I decided it’s worth the gamble.

I’m anxious to see how the early summer plays out. Will things catch up, or should I resign myself to an agonizing month delay on spring produce? Either way, I refuse to be deterred. I’ve already declared this the year of the garden. Last spring I was too tied up with finishing and moving into a new house to really put much attention into the garden. And the year before that I was on couch probation – recovering from eye surgery. Those gardens still produced food, but they were sorely lacking in character. This year though, I am back on my game. I already have black mulch down, pre warming the hot pepper bed.

And then there is the question of the garlic. When we left off last fall, I was terribly nervous about the effects of what I think was a Phytoplasma bacteria outbreak. On the chance that I planted any infected seed, I’m ready with floating row covers to keep different varieties isolated and protected from the leaf hoppers that transmit the bacteria. So far there is not a leaf hopper in sight. But that hardly matters. There is barely garlic in sight. Here’s a shot of the Aglio Rossa taken on May 15 this year.

garlic-2013

I’ve been pulling back mulch, doling out encouragement and assuring the new sprouts that it doesn’t matter that they’re light years behind where last year’s May crop was. Maybe they’re just trying to mess with the leaf hoppers.

garlic-2012

Nevertheless, I’m planning on a later than nornal harvest this season. Luckily our garlic stores are still holding out. The raw cloves are definitely picking up heat, and there are a few green sprouts to remove, but it still cooks up just fine. Lately though I’ve been on an infused garlic oil kick. It’s a great way to add a nice warm garlic flavor to grains, salads, and lightly steamed vegetables. It takes out any heat or bitterness, leaving only a subtle, smooth garlic flavor.

I picked up this tip from the “prep school” section at the back of a Bon Appétite and it’s a trick that has stuck with me. For maximum flavor let the cloves get almost black (but not burnt) before removing them from the oil.

Garlic Oil

4-5 cloves garlic
3 tablespoons vegetable oil
1 tablespoon olive oil

Peel the garlic and crush each clove with the blade of a knife. Heat the oil over low-medium heat and cook the garlic cloves, turning occasionally until the are dark brown to black (about 8 – 10 minutes). Remove and discard garlic, store any unused oil in a sealed jar in the refrigerator.

garlic-oil

good deed

I’m trying to keep my chin up, but every time I go out to work in the garlic patch I wind up feeling gloomy. It’s the uncertainty of my seed stock and the scare of Phytoplasma infected seed that’s getting me down. One minute I think I was ruthless in my culling. But the next moment I’m questioning if I should be planting any of it. It feels risky, but for now I am forging on and planting the little bit of seed that I think is safe. I plan on making heavy use of floating row covers next spring to keep any potentially infected plants isolated from the leaf hoppers that transmit the bacteria.
I’ve been in e-mail contact with a handful of garlic growers and the disease is eerily widespread across the midwest – even as far south as Missouri. Current thinking is that the mild winter coupled with a hot spring and early leaf hopper migration are to blame. The warm spring caused the garlic to sprout earlier than normal. Leaf hoppers don’t actually prefer to feed on garlic foilage, but this year it was one of the few food sources available to them upon their early arrival in the north.
It’s easy enough as it is for me to get pretty wound up about our country’s whacky food and agricultural systems and climate-induced outbreaks like this one only compound my fears. But if nothing else, it is a good reminder of how vitally important small backyard gardens are. Diversity, friends! It’s on our side. A wise approach to apply to all aspects of life, really.
On that note, if you have a few healthy heads of garlic lolling around your pantry, I beg you to take them out back and plant them. It’s an easy good deed, I promise. And it’s a good investment. Garlic might be in hot demand. Just break apart each head into individual cloves and plunge them into some fluffed up soil – flat (root) end down, pointy tip up, an inch or two deep. Give about 6 to 8 inches of space between each clove. Add a hefty blanket of mulch – straw ideally, leaves in a pinch – and you’re all set, you’ve done your part. Garlic pigs nation wide will thank you.
And, if like me, you have any so-so looking garlic sitting about, I have a solution for that as well. We’ll just use that up quick in a garlic infused hot chile paste. Oh fine, if you insist, you can save out one of your healthy looking heads of garlic to use instead. I’ll just look the other way – this sauce is worth it. It’s so good that it has jockeyed for front position in the condiment door of the fridge – sending the big bottle of Sriracha to the back. In my house, that’s sayin’ something.
I was introduced to this knock-out hot sauce a few years ago when my friends Bob and Reba came to dinner bearing a jar of it. It was a perfect condiment for the large platter of Indonesian gado-gado I had made. Fiery, but tangy with just a hint of sweet. Later, Bob assured me it’s the perfect condiment for almost everything. Stir-fries, beans, eggs, even – he claims – peanut butter sandwiches. And he’s right. It’s built on a flavor combination that makes you crave more, in spite of the heat.
After I ate through my first jar, Bob and Reba graciously set me up with two more – and the recipe. As it turns out, it’s a recipe from a cookbook that has been sitting on my shelf for years – Sundays at Moosewood Restaurant. The book is a favorite, but it’s thick, and evidently I have not discovered all of it’s gems. I love it when that happens. The book is a collective of 18 different authors, each one focusing on a particular ethnic cuisine. The chile paste – Sambal Bajag – hails from Southeast Asia.
Towards the end of each garden season, I round up the last of the tomatoes and hot peppers for a octuple batch (that’s eightfold, and yes, I had to look up the proper term.) This generally yields about five 1/2 pint pressure canned jars to stick in the pantry.  What follows is the single recipe which makes a healthy 1/3 cup of sauce. This will keep in the fridge for a good long while. Which is nice, because a little dab goes a long way. You can use any combination of finely chopped hot peppers – fresh, dried, or plain old pepper flakes. I typically use a mix of tiny dried Bird’s Eye and semi-dried Ho Chi Minh from the garden. Whatever you do, be bold! Don’t  skimp! As the recipe notes, “If it’s not hot, it’s not right.”

Sambal Bajag
Adapted from Sundays at Moosewood

3 tablespoons oil
1/4 cup minced onion
2-3 tablespoons minced garlic
4-6 teaspoons well minced or crushed hot peppers (dried red chilies, pepper flakes, or fresh)
1/3 – 1/2 cup finely minced tomato
1 teaspoon kosher salt
2 teaspoons honey
2 teaspoons dark molasses

In a heavy frying pan or wok, heat the oil and stir-fry the onions and garlic. after a minute or so, add the hot peppers. Reduce heat and stir constantly so they do not burn. As soon as the peppers darken a little, add the remaining ingredients. Simmer the sambal on very low heat until most of the moisture has evaporated and the oil gradually returns to the surface – about 20 minutes. By this point the sauce should be so well cooked that you can’t really detect the tomatoes. Store in refrigerator. Makes about 1/3 cup.


instapig

No Instagram images were found.